
Installation & Deployment
Dynamixs.AI can be deployed in different ways depending on the needs of your project. The simplest approach is a standard Docker Compose setup using the pre-built platform image — no build step required, up and running in minutes. For projects that need deep UI customization or customer-specific Java services, a Maven-based custom build is available that lets you extend the platform without ever modifying it directly. Both approaches share the same Docker infrastructure and the same BPMN-based configuration model.
This guide starts with the Quick Start option — the recommended starting point for most projects.
Quick Start with Docker Compose
The fastest way to get Dynamixs.AI up and running is using the official Docker Compose setup. No build step is required — you pull the pre-built platform image and configure it with your own LLM endpoint and BPMN models.
This approach is ideal for:
- Evaluating the platform
- Standard deployments without UI customizations
- Projects where customer-specific logic lives in external services (e.g. ERP connectors via REST)
Prerequisites
- Docker & Docker Compose installed
- A GitHub account with access to the Dynamixs.AI GitHub Container Registry
- An LLM endpoint compatible with the OpenAI API
Step 1 — Authenticate with the Container Registry
Dynamixs.AI Docker images are hosted on the GitHub Container Registry (GHCR). Before you can pull the image, you need to authenticate with a GitHub Personal Access Token (PAT).
Create a Personal Access Token:
- Go to GitHub → Profile Settings → Developer settings → Personal access tokens → Tokens (classic)
- Click “Generate new token (classic)”
- Set a meaningful note, e.g.
dynamixs-docker-access - Select the scope:
read:packages - Click “Generate token” and copy it immediately — you won't see it again
Log in with Docker:
echo YOUR_PERSONAL_ACCESS_TOKEN | docker login ghcr.io -u YOUR_GITHUB_USERNAME --password-stdin
Step 2 — Get the Docker Compose File
Use the official docker-compose.yml from the Dynamixs.AI Partner Template. It includes all required services out of the box:
| Service | Description |
|---|---|
| Wildfly 32 | Jakarta EE Application Server |
| PostgreSQL | Primary database |
| Cassandra | Archive / document store |
| Apache Tika | OCR service |
| Collabora Online | Document editing (WOPI) |
| Prometheus + Grafana | Monitoring |
Step 3 — Configure the LLM Endpoint
Before starting the stack, you need to provide your LLM endpoint configuration. See LLM Endpoint Configuration for details.
Step 4 — Start the Stack
docker compose up -d
The application will be available at http://localhost:8080.
Step 5 — Initial Setup
Once the stack is running, open your browser at http://localhost:8080 and log in with the default admin account (admin / adminadmin).
Complete the following four steps to get your first workflow running:
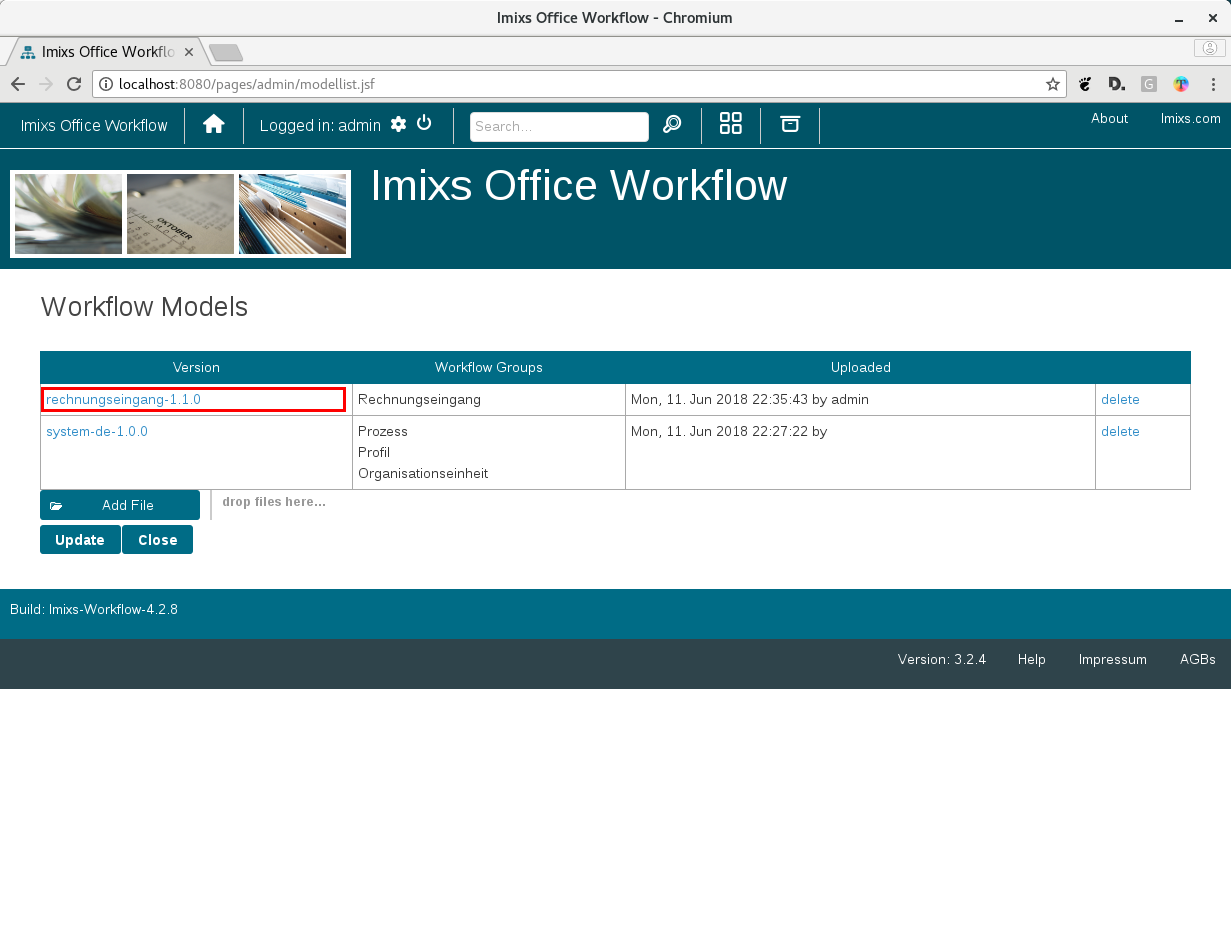
1. Upload a BPMN Workflow Model
Go to Administration → Models and upload a BPMN file. Ready-to-use templates are available in the Dynamixs.AI BPMN Library.

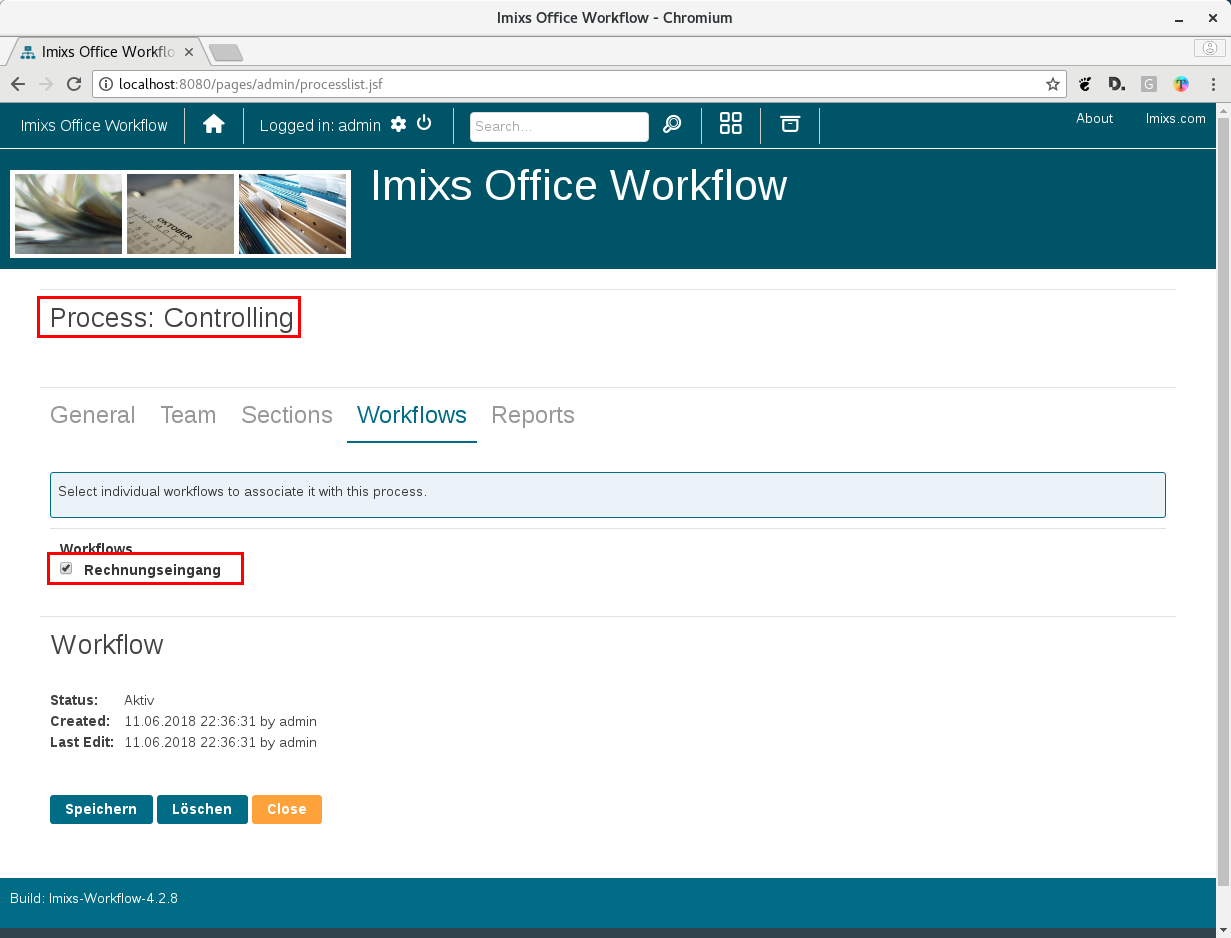
2. Create a Process
Go to Administration → Processes and create a new process.
3. Assign the Workflow Model
Assign the uploaded BPMN model to your new process.
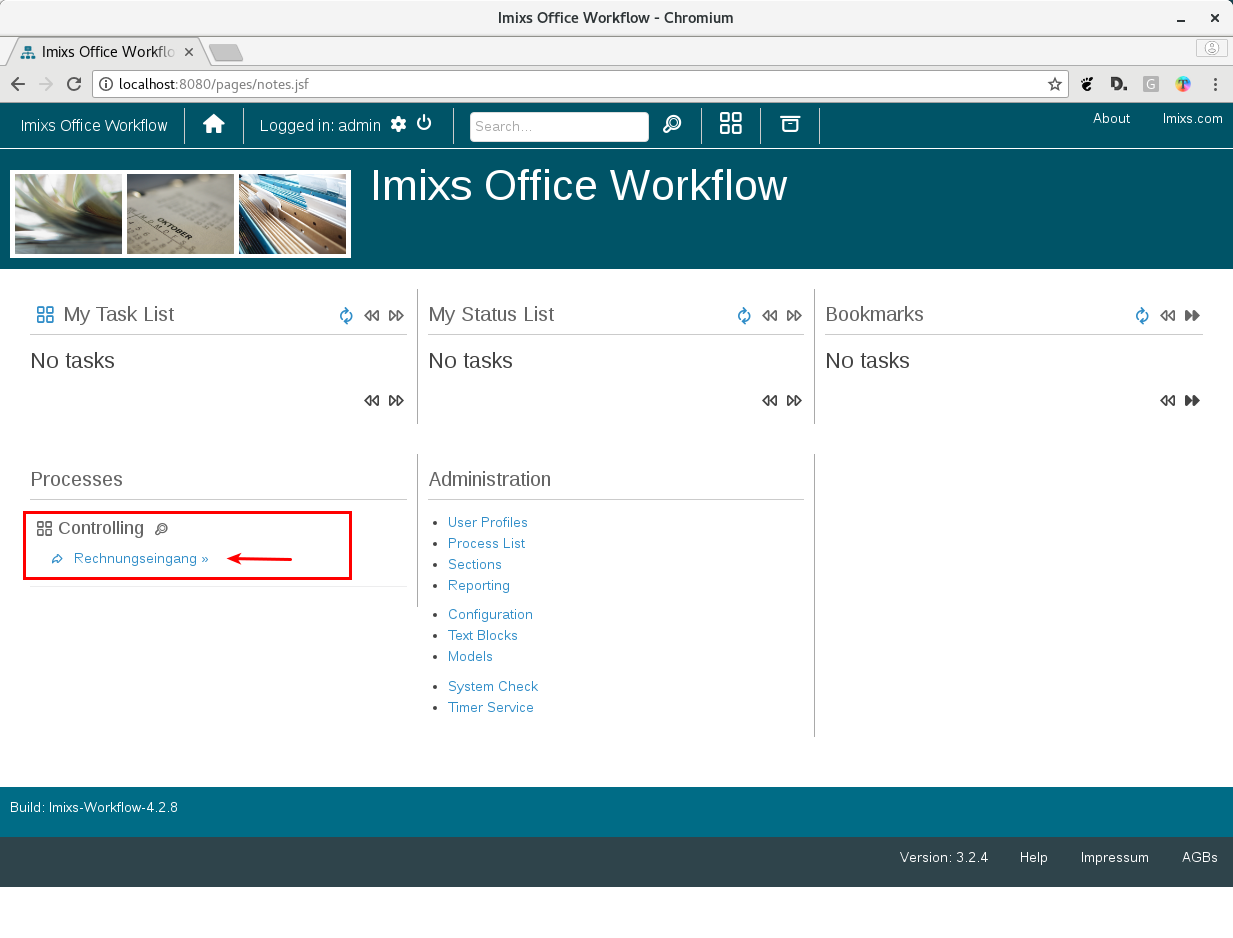
4. Start the Workflow
The new process now appears on the home screen. Click on it to start the corresponding workflow.
What's next
- LLM Configuration — How to setup your LLMs.
- Custom Builds — How to create a custom build.